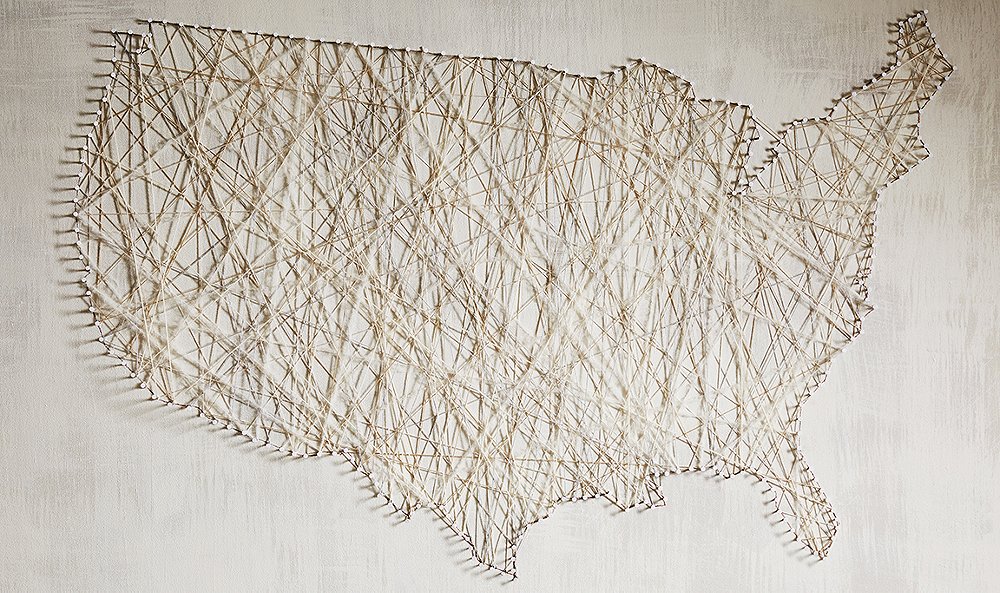
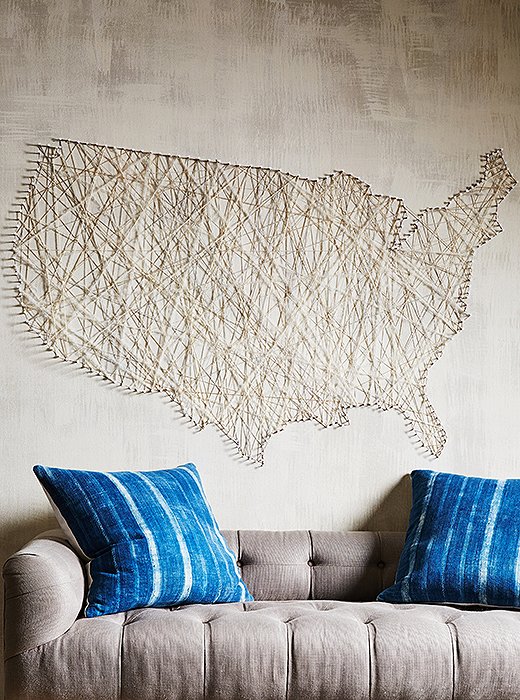
We love the graphic impact and rich character a map can add to a space—whether it’s a framed vintage piece or a colorful modern version. Add in rich texture and dimension, and the statement-making potential is even greater. In the spirit of Independence Day, we’re bringing you a stunning DIY take on a U.S. map, courtesy of One Kings Lane’s very own head stylist, Anthony Santelli. The best part? You can customize it in endless ways to suit your style and your space.
What You’ll Need:
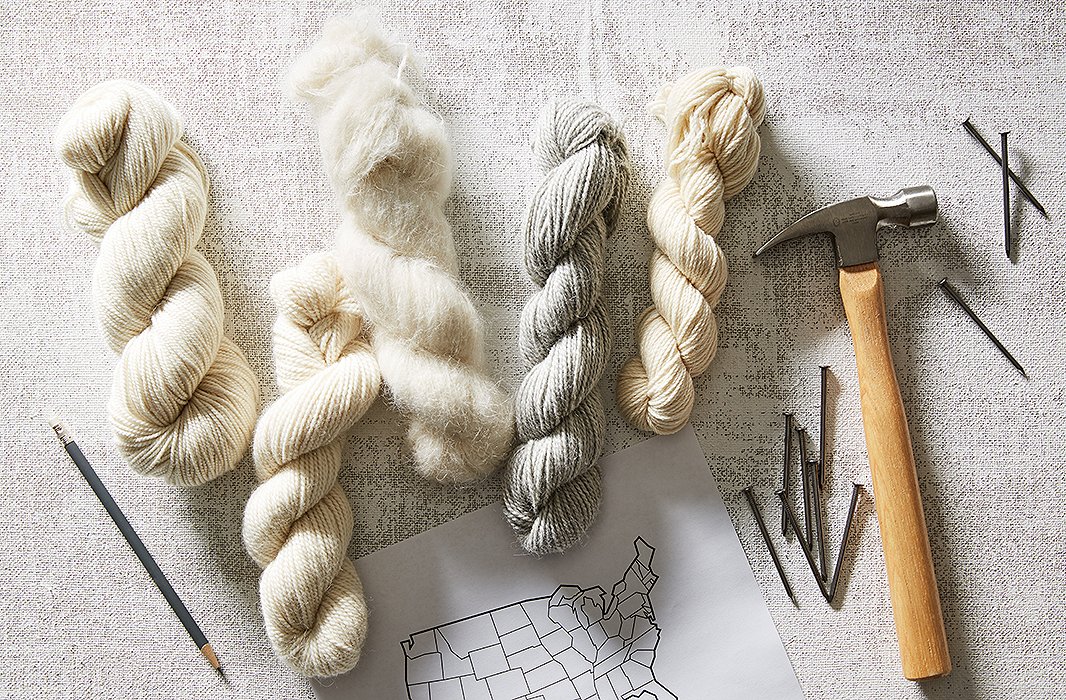
Supplies make a map approximately 5 feet wide by 3 feet high.
• 3-5 skeins of wool yarn in complementary colors and a variety of textures
• approximately 200 3-inch nails*
• hammer
• map image and projector OR full-size map printout
*For smaller designs, smaller nails will work just fine. Just make sure the nails have substantial heads to keep the loops of yarn from slipping off.
Step 1: Project and Trace
There are two methods for transferring your map design to your wall. If you have a portable projector, simply project the image directly onto the wall and trace the outline with a pencil. Alternately, have your local copy shop enlarge and print a map to your desired size, then tack the map to your wall, hammer the nails right through the paper, and tear the sheet off when you’re finished (in which case, skip step 2 below).
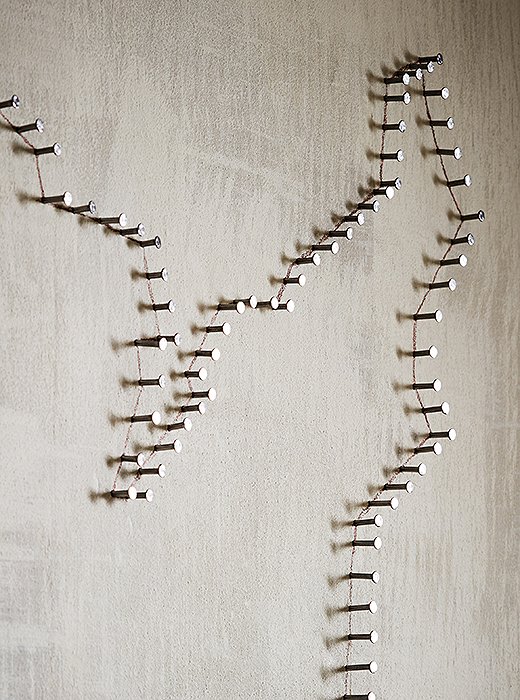
Step 2: Define Your Outline
Starting at any point along your traced outline, begin hammering nails into place. Space nails roughly 1 inch apart to create a clearly defined shape.
Stylist’s note: For a renter-friendly alternative, create your design on a wooden board instead of a wall. Not only does this save you from having to patch multiple holes down the road, but you’ll also be able to move your design if you wish.
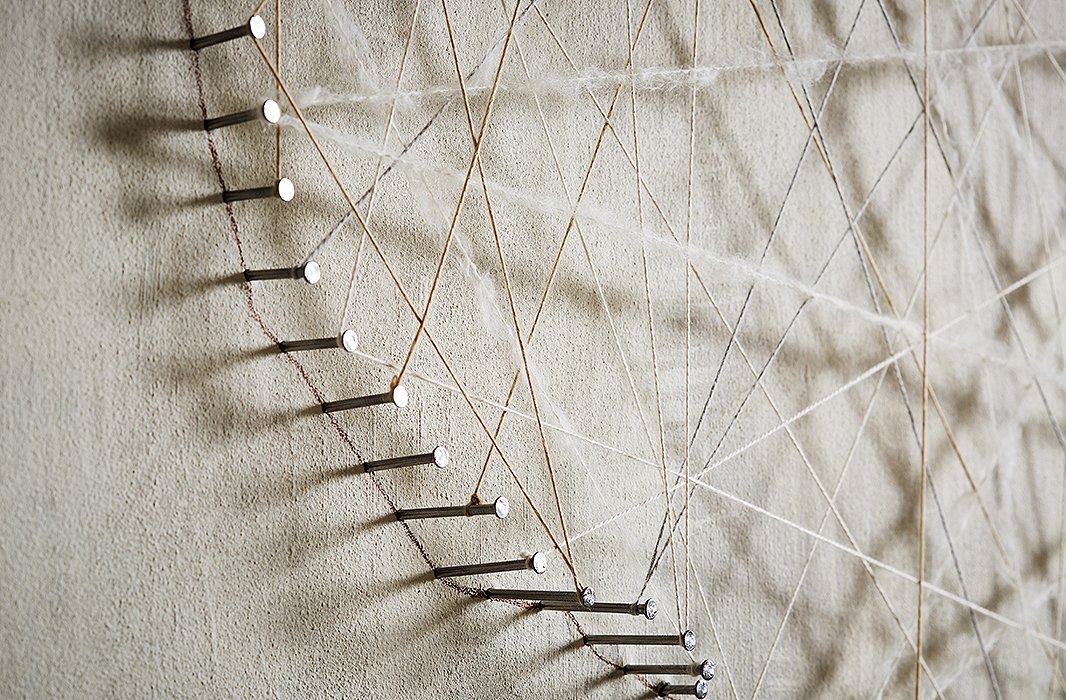
Step 3: Wrap It Up
Begin by knotting one end of a 6- to 8-foot length of yarn around any nail. Stretch the yarn across the map to a second nail and loop it around once. Continue stretching and looping in a zigzag pattern, keeping the yarn taut, until you’re left with around 8 inches of loose yarn. Knot the end around a nail to secure and trim off any excess.
Repeat with more lengths of yarn until you achieve a look you like, making sure that each nail has at least one loop or knot of yarn (some may have multiples). It helps to step back after every few additions to check out the overall balance of your design.
Make It Your Own
The steps above can be used to create any number of designs—try a map of your state, a letter, or a graphic shape. The palette is up to you too: Here, Anthony opted for cream and gray for a minimalist take, but any complementary combination of colors—or even one single hue—would work beautifully.
Shop our favorite American-made finds →


Join the Discussion