One Kings Lane stylists Anthony Santelli and Drew Welsh are DIY powerhouses, turning raw materials into polished creations and dreaming up inventive solutions to common decorating problems. Their latest jaw-dropping DIY makeover: Drew’s own NYC bedroom, a pint-size space in need of some serious storage solves. Below, our editor tells us how the project came to life.
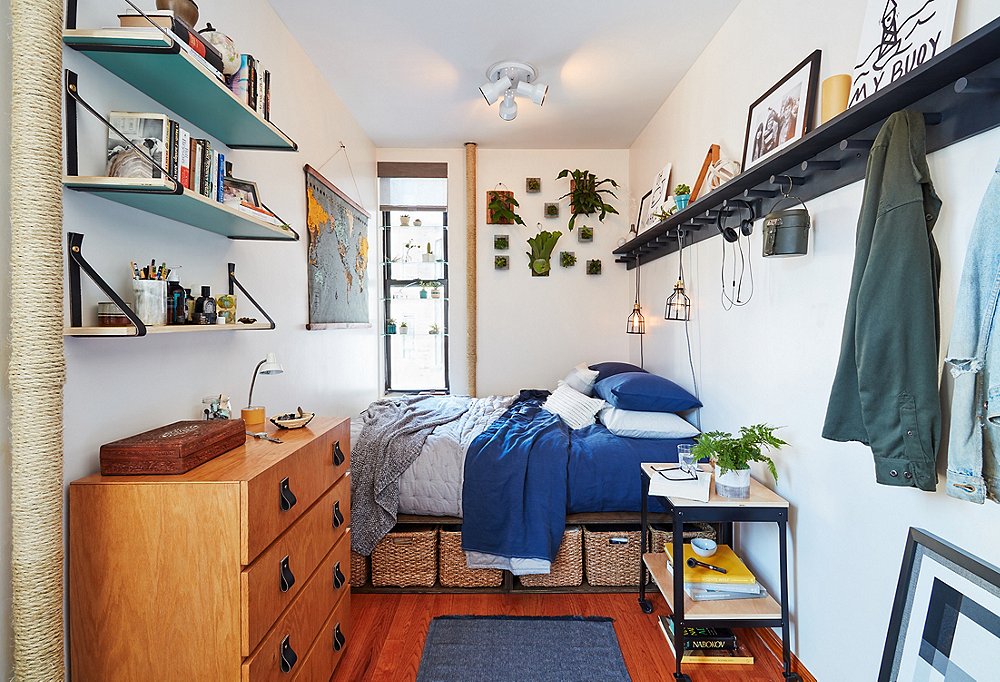
There are small spaces, and then there are small spaces. At just 7 feet wide by 14 feet long, stylist Drew’s New York City pad is one of the latter. It was also seriously storage-challenged. Without a closet to speak of, Drew had been storing clothing on open shelving, giving the room a cluttered feel, and bulkier items were simply lined up against the walls. “It was really impeding on his space,” says Anthony. “Our goal was to take into account everything he wanted to keep in the space and then create a designated spot for it.”
Practical concerns aside, the pair also wanted to incorporate elements of Drew’s personal style. Inspired by a vintage map Anthony picked up for a song at a Pennsylvania flea market, Anthony and Drew decided on a mostly neutral color scheme brightened by touches of yellow and blue. Leather detailing and raw wood elements help create the modern, masculine look that Drew loves, while relaxed textiles and plenty of greenery lend a soft, organic contrast.
Shown: Washed Linen Bedding by Matteo for One Kings Lane in Indigo.
Bedroom Solve #1: Serious Storage
An avid artist and nature-lover, Drew stocks a variety of art supplies and keeps camping gear on hand for frequent trips upstate. Since these items couldn’t be stowed away in a closet, they were crowding surfaces and taking up precious floor space.
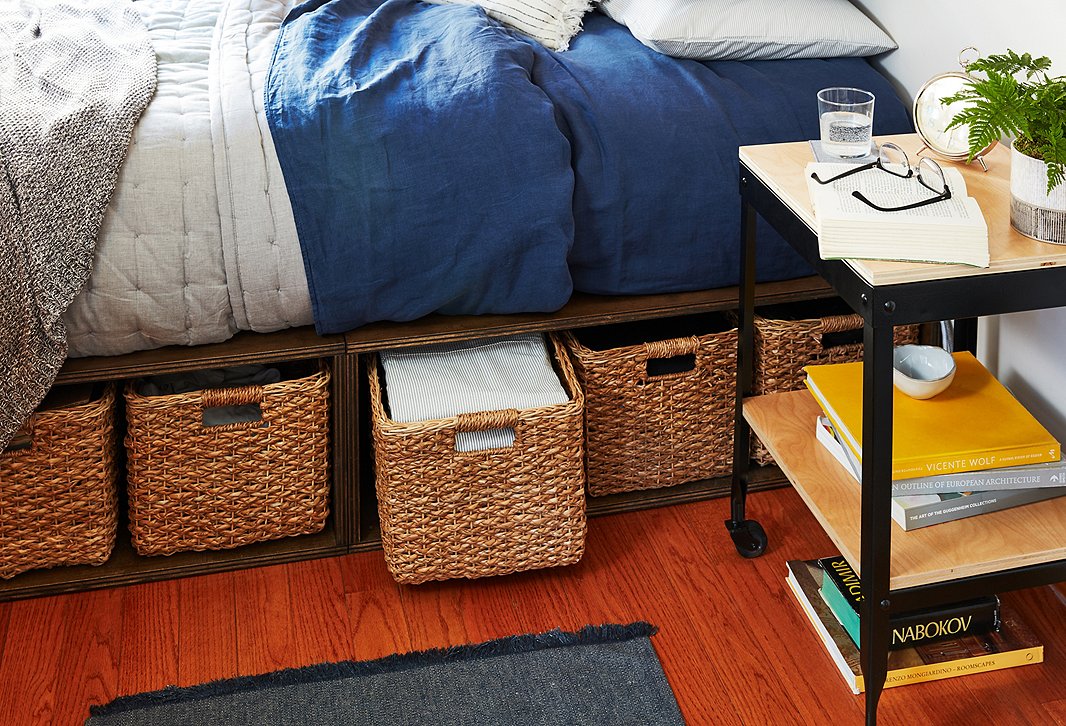
A storage bed offered the ideal solution, but Anthony and Drew couldn’t find one that fit their exact specifications. So, like the dedicated DIYers they are, they opted for a custom solution. Forgoing drawers (too much wasted space), Anthony and Drew designed the bed so that the entire platform was open for storage. “We took advantage of the depth of the queen-size mattress and made the storage area extend the full depth and length of the bed,” Anthony says. “Now Drew has the flexibility of storing seasonal and less-used items toward the back of the bed frame and keeping the things he uses more regularly closer to the front.” A row of woven baskets holds these oft-used items and gives the bed a polished look. “Everything has its place, and it feels great,” Drew says.
Bonus Solution: Dressed-Up Dresser
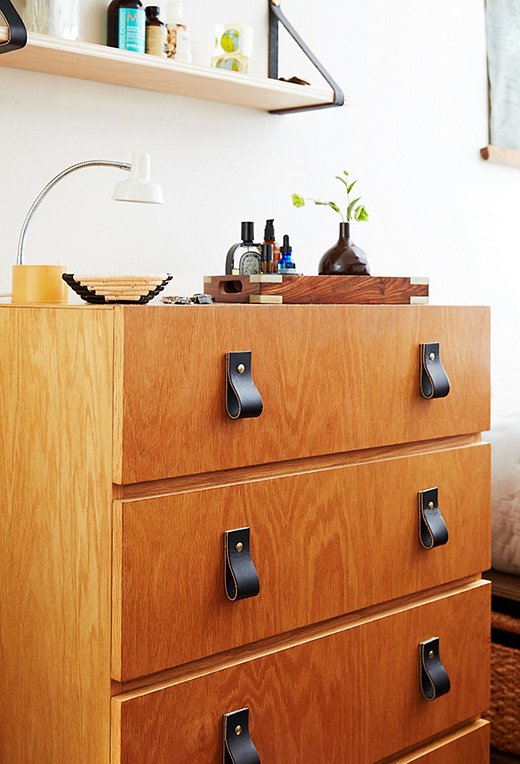
Both Drew and Anthony are expert secondhand shoppers and wanted to incorporate a thrifted piece into the room. They found a four-drawer wooden dresser with clean lines and ideal proportions that just needed a bit of TLC. After cleaning up the finish, Anthony and Drew added some character to the dresser with a set of DIY leather drawer pulls. “It totally transformed it,” Anthony says.
Click here for the full step-by-step tutorial for this drawer-pull DIY. →
Shown: Petrified-Wood Bookends.
Bedroom Solve #2: Going Vertical
“The size and narrowness of the space was one of the biggest challenges we faced,” says Anthony. To create additional surface space, they were forced to build up, not out. “Fortunately the ceiling in the space is high,” Anthony says. “We were really able to take advantage of adding storage to the walls without making the space feel too cramped.”
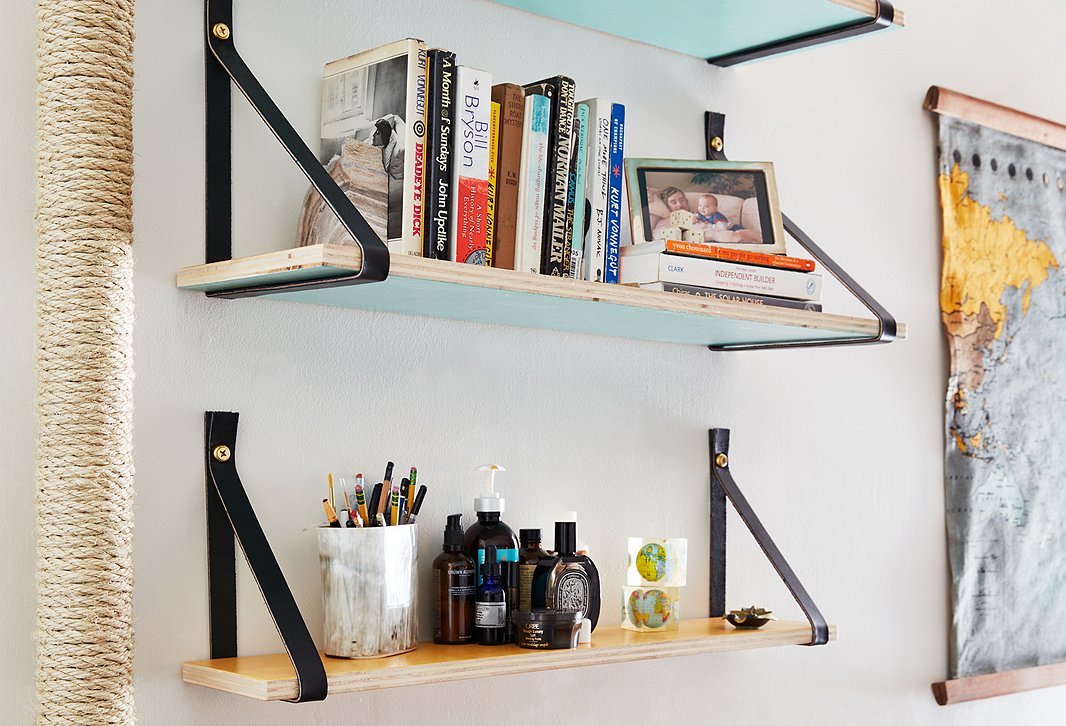
Above the dresser, they built a trio of wooden shelves to hold Drew’s books, framed photos, and a few daily essentials. To give the shelves a modern, masculine feel, they crafted supports out of leather straps and brass hardware. For a bright twist that picks up on the vintage map to the right, they painted the undersides of the shelves blue and the top surfaces yellow.
Click here for the full step-by-step tutorial for this leather-strap shelf DIY. →
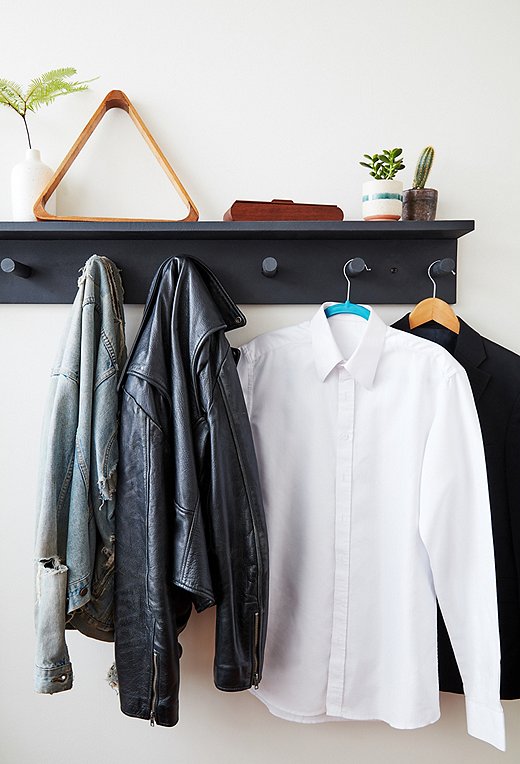
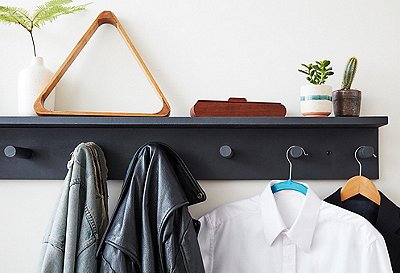
To maximize wall space above the bed and bedside table, Anthony and Drew built a modern Shaker peg rail. “Not only did it add the much-needed hanging space,” Anthony says, “but it also created a bit of architectural interest.” At eight feet long, it provides ample room to display framed artwork and other accents and to keep clothing and bags off the floor and out of the way.
Click here for the step-by-step tutorial for this peg rail DIY. →
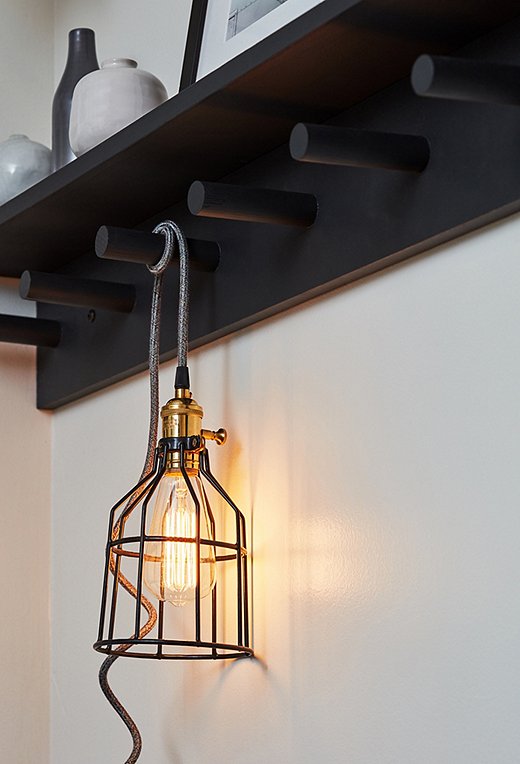
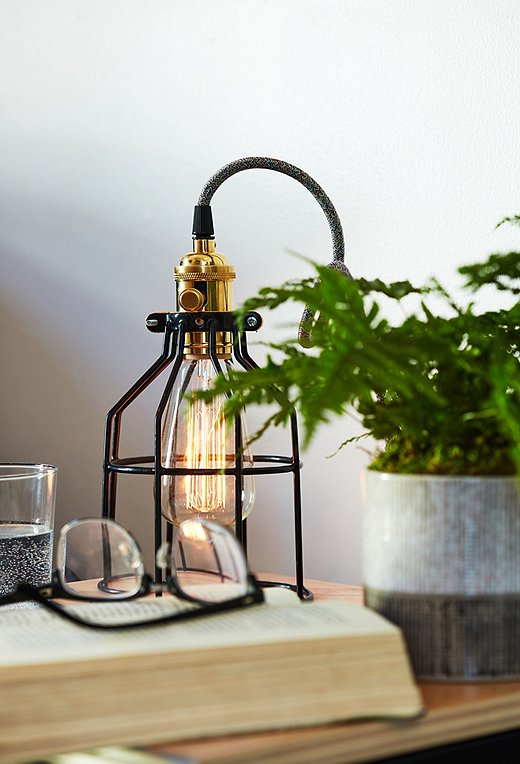
Bedroom Solve #3: Versatile Light Sources
Before, the space was lit only by an overhead fixture that cast a too-harsh light. Instead of adding in floor and table lamps, which would have eaten up precious surface space, Drew and Anthony whipped up a pair of hanging sconces. Because they’re on extra-long cords, they can hang anywhere along the peg rail or even rest on a table, so whether Drew stays up late reading or working on a project, he can position a task light just where he needs it.
Bedroom Solve #4: The Homey Touches
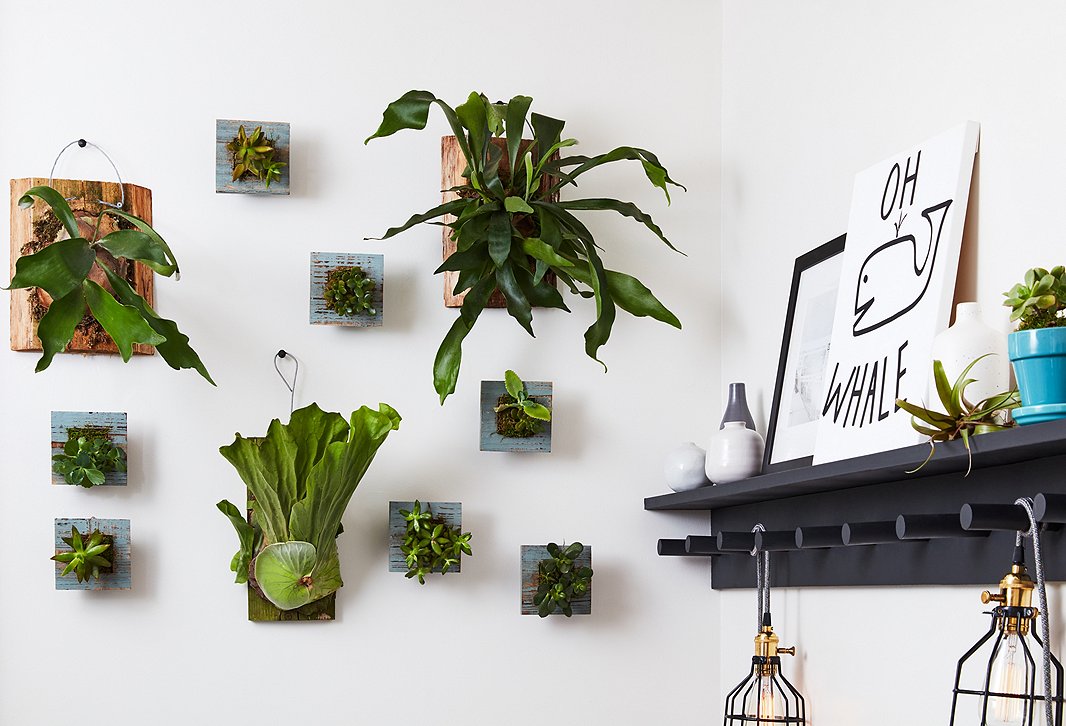
To bring a natural element into the room, Anthony and Drew turned to greenery. They first transformed a blank spot at the far end of the space into a “living wall” with a mix of wall-mounted staghorn ferns and succulents. Then, to create space for a few light-loving plants—and help soften the city views—they mounted simple glass shelves inside the window frames.
And since the bed had previously been the only seating in the space, Anthony and Drew devoted an unused corner to a small midcentury-style settee paired with a woven ottoman. A round mirror, finished with leather-strap detailing that echoes the nearby shelves, amplifies light from the windows to help the room feel as airy as possible.

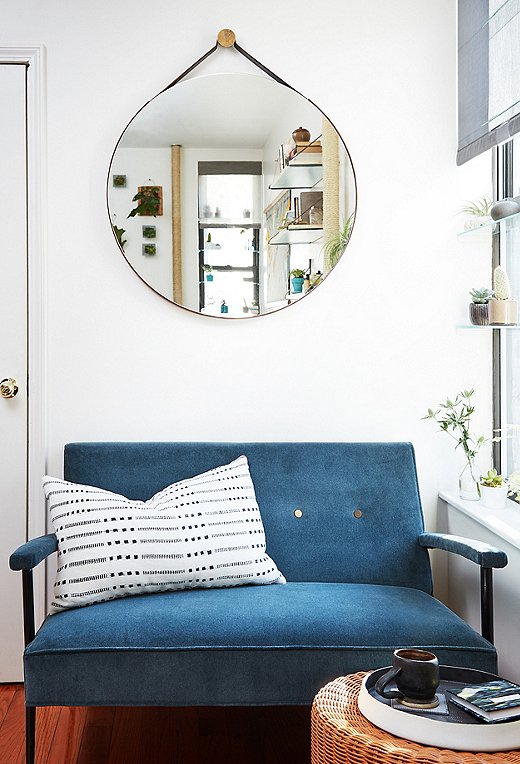
Bonus Solution: Rope-Wrapped Pipe
New York City apartments can come with charming touches—original molding! skyline views!—and not-so charming ones, like heating pipes that turn white-hot when outside temperatures dip. To add some insulation and prevent burns—especially from the pipe next to the bed—Anthony and Drew wrapped the pipes in rope. It’s a laborious process but well worth it to create a safer, more comfortable space.


Join the Discussion