
New York-based ILevel has hung hundreds of thousands of artworks everywhere from museums to celebrities’ living rooms to the apartments of busy families. Founder David Kassel and colleague/artist Chris Deo are often called into a home only once the paint has dried on the walls, the furnishings are set, and the rugs have been laid down. Yet many times, the addition of art turns out to be the most transformative step of all. Their displays let the art lead while staying in touch with the rest of the room and the surrounding architecture. Here, their best advice on how to make the most of each display—and how to hang art like a pro.

ILevel’s David Kassel and Chris Deo.
1. Plot out your display. Before picking up a hammer, plot out what’s going to go where.
2. Trust your instincts. “I’d say 90% of the time, we just go by what looks good,” David says. This is especially true when hanging art in any space affected by furnishings and architectural elements such as mantels or archways. For these, have someone hold the piece while you look at it from seated and standing positions. It’s common to hang art too high, which makes a piece look as if it’s floating around on its lonesome. When it doubt, hang low, so that the artwork relates more closely to the furniture or the architecture.
3. Use a measuring tape. This is essential, especially when hanging in what David calls “gallerylike spaces”—hallways, stairways, alcoves, or anywhere else not dominated by furniture or strong architectural elements. For these areas, hang pieces so that the bottom is 58″–60″ from the floor. If you’re hanging one artwork on top of the other in such a space, make 58″–60” the midpoint between the two; then give two inches of separation between the edges of the frames.
4. Embrace irregularity. An art grouping might flow like a cloud or loosely from a top-heavy triangle, or it might fall into a gridlike pattern. Lay out your art on the floor beneath the wall first and play around. To translate the pieces to the wall, measure the full height and width of each, and then mark off those outermost points on the wall using painter’s tape. From there, start hanging. Remember, imperfection is more than okay; even if the golden number for spacing between works is two inches, there’s no need to be too rigid.
5. Don’t line everything up. “Often people are tempted to line a piece up with the middle of a molding or the height of a nearby mantel or sofa,” David says. This ends up feeling monotonous—instead, they take pains to give each artwork its own horizon line, keeping the entire room dynamic.
6. Use the images to create focus. Some images have an ability to direct attention, even create a mood. For example, if you’re hanging a group of works that includes a side-facing portrait, position the portrait so that it’s looking into the group, rather than away from it. Or if the same portrait is near a window, position it to the side of the window where it will be facing into the room, not gazing out the window. Similarly, darker pieces carry more visual weight, so ILevel positions them higher in a group so that all the focus doesn’t clump at the bottom.
7. Leave some blank walls. “This will happen by default,” David says—once you’ve hung your favorite pieces in the places that make the most sense, you’ll be left with some blank walls. Let them be. The effect of the art that’s there will be even more potent and lovely with some negative space.
8. If you make a mistake, don’t panic. “Any holes in the wall from a picture hook are purely cosmetic,” David says. You’ll likely cover them up once you hang the art properly; if not, “use some Spackle and the original paint if you have it. Or even bit of toothpaste.”
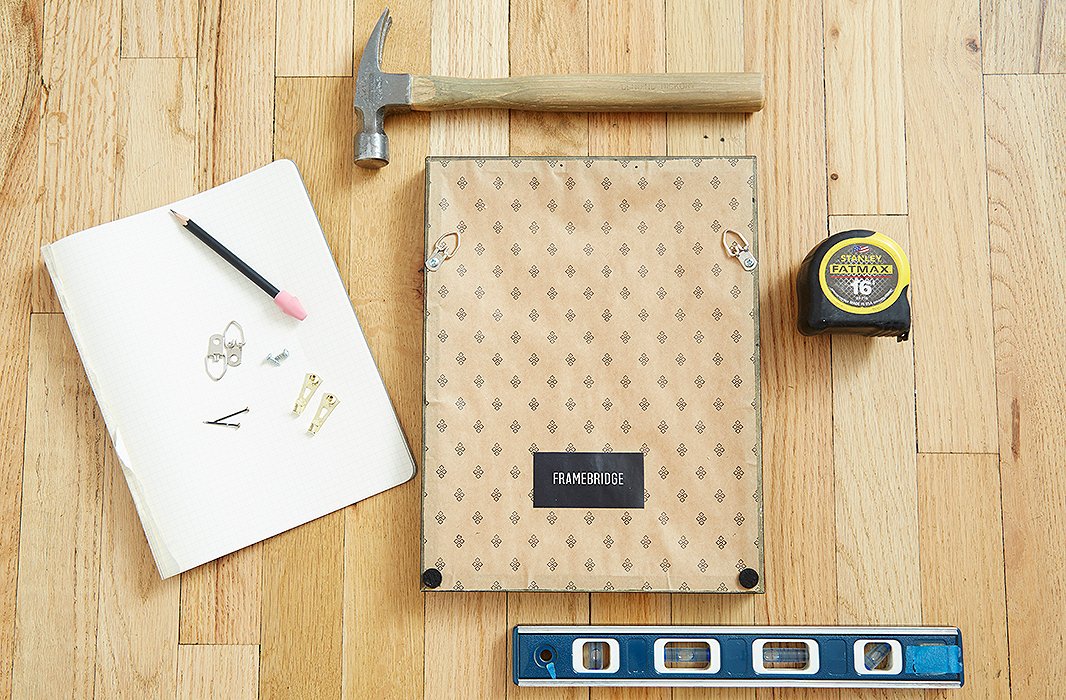
The necessary tools, according to ILevel, clockwise starting at the top: a hammer, a measuring tape, a level (David recommends getting one that’s at least 24″ for accuracy), gold picture hooks with their longer nails, D-rings with their short pinhead screws. And of course a pad to sketch out any designs or measurements.
The Right Tools: Put a D-Ring on It
For hanging hardware, David can’t recommend D-rings enough. Rather than placing a hanging wire onto a picture hook in the wall, IFrame hangs D-rings directly onto picture hooks. They are so rock-solid stable that you won’t need to keep pushing the picture back into a straight line. And even if you brush past the art too aggressively, it barely moves. D-rings work for almost anything, from small light pieces to very heavy works. Request that the framer put D-rings on your art if possible.
If a piece comes outfitted with different hanging hardware—a sawtooth hanger or a hanging wire—ILevel will replace it and quickly screw in some D-rings instead.
1. Get the right supplies. At a hardware store, you’ll likely find OOK D-rings. Buy picture hooks and D-rings in equal numbers—two of each for each work. If you already have D-rings on there, just buy a picture hooks for every D-ring. Pay attention to the weight limit on all this hardware—Chris advises erring on the conservative side with the weight limits given for hardware: “If it says it holds 30 pounds, assume half that.”
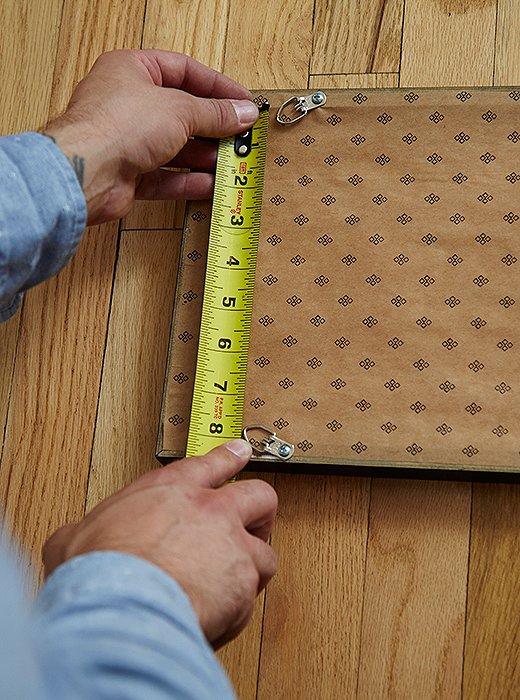
Measure the distance between D-rings in order to find the right distance to place the picture hooks on the wall.
2. Do D-rings right. Along the back of the frame, measure down two to three inches from the top of the frame. Mark both sides—the important thing is that both are the exact same distance from the top. Then screw the rings in, and angle them to face inward slightly—this obscures the hardware and gives the picture even more stability.
3. Add hooks to wires. If you end up keeping a hanging wire on a painting, perhaps because it’s an antique and the wire is still strong, hang it with two picture hooks instead of one central one. (“If you only hang on one hook, the piece will swing like its on a pendulum,” David says.) Space them out to two-thirds of the width of the frame.
4. Get hanging. Once you’ve decided the best spot for your artwork, hold it in place and make a tiny pencil dot at the center of the frame’s top. Put the art aside for a moment and measure down from that dot however far the D-rings are from the top of the frame. To find where the two picture hooks will go (one for each D-ring), measure the total width between the D-rings and split that number—then mark off that distance to the left and right of the center. Nail the picture hooks into the spots, and hook on your D-rings. Voilà!

Using a level to check the straightness of a frame. Notice how some of these pieces are spaced two inches apart, while others have more space between them–charming irregularity at work.
Always Even Out
Once a picture is hung, always center a level on its top to see if it’s straight. But, David cautions, this is another area where eye-balling it might be the most important part.
1. Let your eye guide you. “In New York, so many of the floors and walls are crooked. Often if something were hung perfectly level, it would look crooked.” So they make adjustments—tiny tilts once something is hung—to get it right. If one end of the piece is more than 1/4″ too high, David suggests moving the location of the D-ring rather than the location of the picture hook. It might seem counterintuitive, he says, but “if you want to lower one side, you raise that side’s D-ring.”
Shop all art >
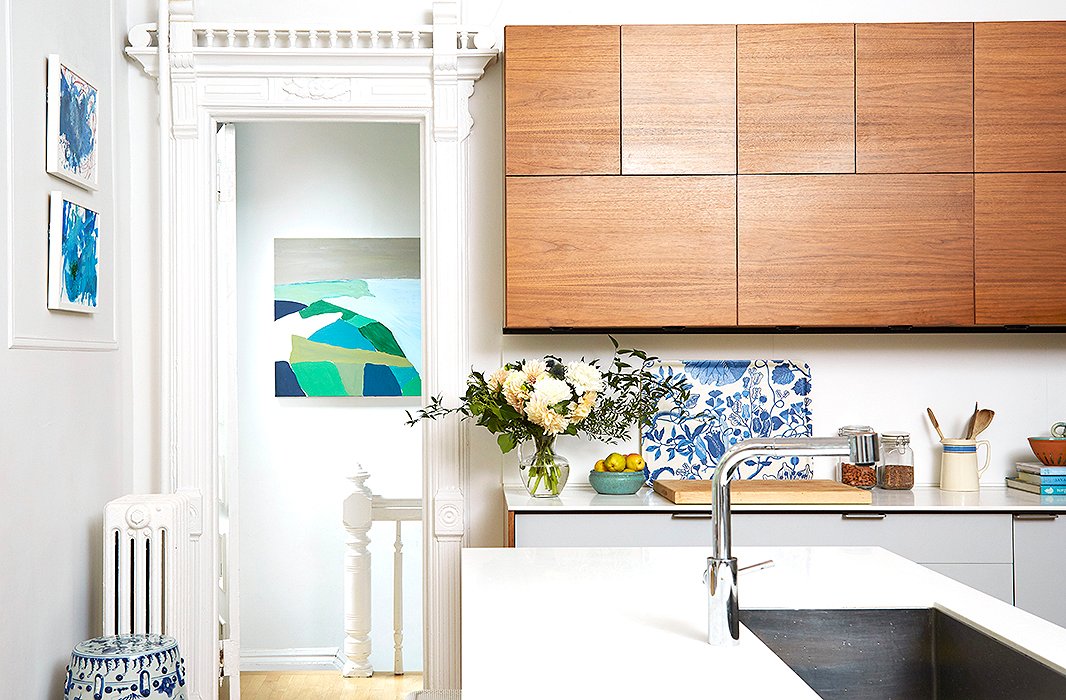
ILevel hung a large oil-on-canvas so that it almost fills the width of the doorway and commands attention from a distance. A child’s paintings hang in the kitchen, just above the wall molding—in this case, the molding became the architectural point of reference.


Join the Discussion